
By Craig Blunt
This guide is for cross country glider pilots who are ready to expand their horizons. If you've ever felt the need for a dedicated flight computer because ‘everyone else has one’, this is for you.
A word of caution for new pilots – if you are still learning to fly or are newly solo in a single-seater and not yet venturing far from the airfield, do not install a flight computer yet. Your instructors will not be teaching you about them at this stage. Your primary focus must be on developing your fundamental skills, especially your lookout. Introducing a screen too early will distract you, slow your progress, frustrate you and increase your training costs. Most importantly, it can make you a hazard to other pilots. Your time for advanced avionics will come.
Why Use a Flight Computer?
Virtually all high-performing competition and cross country pilots use a screen in their cockpit. The advantages are significant:
- Customisation: They display a vast array of information in a format you design, tailored to your needs.
l Reduced Workload: They automate complex calculations (e.g. final glides, wind components), freeing up your mental capacity for critical decision-making.
- Situational Awareness: A well configured screen allows you to absorb key data at a glance, enabling you to spend more time with your head out of the cockpit, scanning for traffic and observing the weather.
Choosing, setting up and effectively using a flight computer is an ongoing process of refinement and self-analysis.
Initial Considerations
Before diving into specific products, you need to answer two fundamental questions about your intended use, as this will influence your hardware and software choices.
- Will this be for your private glider that you fly exclusively? If so, permanent, panel-mounted installation might be ideal.
- Will you be flying multiple aircraft, including club gliders? In that case, a portable, easily mounted solution will be necessary.
Flight Computer Software
Several software and hardware options are available, including these popular tools.

LXNAV
This software is integrated into LXNAV's dedicated hardware. These are premium, panel-mounted units that are tightly integrated with the glider's instruments.
- Cost: High initial investment.
- Pros: Powerful, all-in-one system.
- Cons: High complexity and a steep learning curve. Requires significant time and dedication to configure and master.
gliding.lxnav.com
SeeYou Navigator
This popular software package is used on Oudie N devices, but it can also be used on Android and iPhone.
- Cost: Annual subscription
- Pros: User-friendly interface, excellent feature set, cross platform compatibility.
naviter.com/seeyou-navigator
XCSoar
A community of pilots and developers maintain XCSoar as a powerful, open source project.
- Cost: Free, open source
lPlatform: Runs on any Android device, as well as dedicated hardware from various vendors (e.g. XCNav, Kobo e-readers, devices). It is also the navigation software for Openvario Flight Computer. You can buy or build your own Openvario using COTS hardware, Linux operating system and XCSoar. openvario.org
-lPros:
Highly customisable, extensive features, no cost.
- Cons: Can have a steeper learning curve than Navigator; Android-only for mobile devices.
xcsoar.org
Clearnav
Similar to LXNAV, Clearnav is a combined hardware and software solution delivered as panel-mounted units that are highly integrated with the glider's instruments.
- Cost: High initial investment
- Pros: Powerful, all-in-one system.
- Cons: Highly complex with a steep learning curve. Requires significant time and dedication to configure and master.
clearnav.net
Hardware and Installation
Once you have an idea of your software, you need to consider the physical hardware.
- Mounting: Will you panel mount your device or use a portable mount? In club gliders, suction cups on the canopy are typically prohibited as they can cause damage. The standard is a RAM ball mount, which provides a secure and flexible mounting point.
- Power: Your device will need a reliable power source. This may involve wiring it to the aircraft's main battery or using a separate power bank for portable setups.
- Interfacing: You may want to interface your device with other instruments, such as your variometer or FLARM, to receive integrated data.
- Mobile Data: A device with a SIM card can provide invaluable real-time information, such as weather radar overlays and OGN position data for other aircraft.
Developing Your Screen Philosophy and Setup
Your flight computer is a tool to provide you with the information you need to make better decisions. The goal is to quickly acquire essential data with minimal distraction.
Starting with the Basics
First, master the fundamentals. Configure your screen only with the essentials and practice using them until they become second nature.
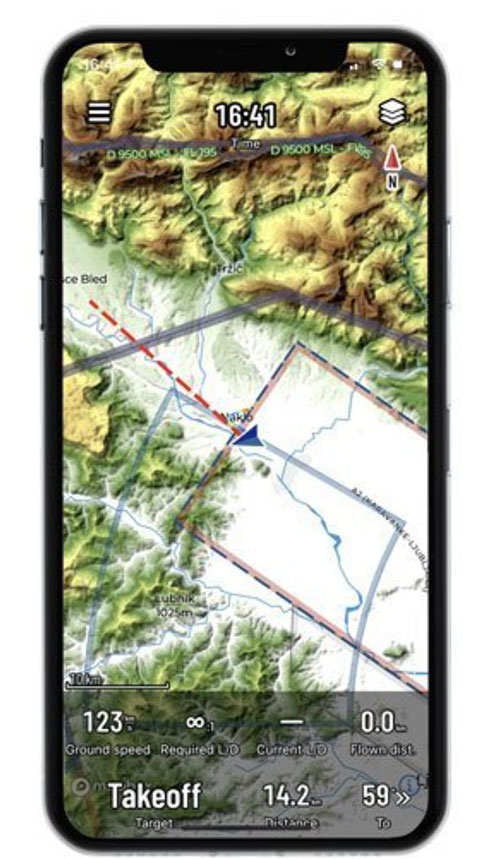
- Moving Map: Learn how to load and modify a task quickly and efficiently.
- Wind Information: Display a wind arrow and/or numerical data. Practice interpreting it at a glance.
- Airspace: Your device will provide visual and audible alerts for airspace. Understand what these alerts mean and how to react.
- Traffic: The traffic display (FLARM/OGN) is a vital tool. Remember, it shows the last reported position of other aircraft, not necessarily their current position, and it does not display all traffic. It is an aid, not a replacement for a vigilant lookout. Fly with just these basics initially. Train yourself to find the information you need and get your eyes back out of the cockpit as fast as possible.
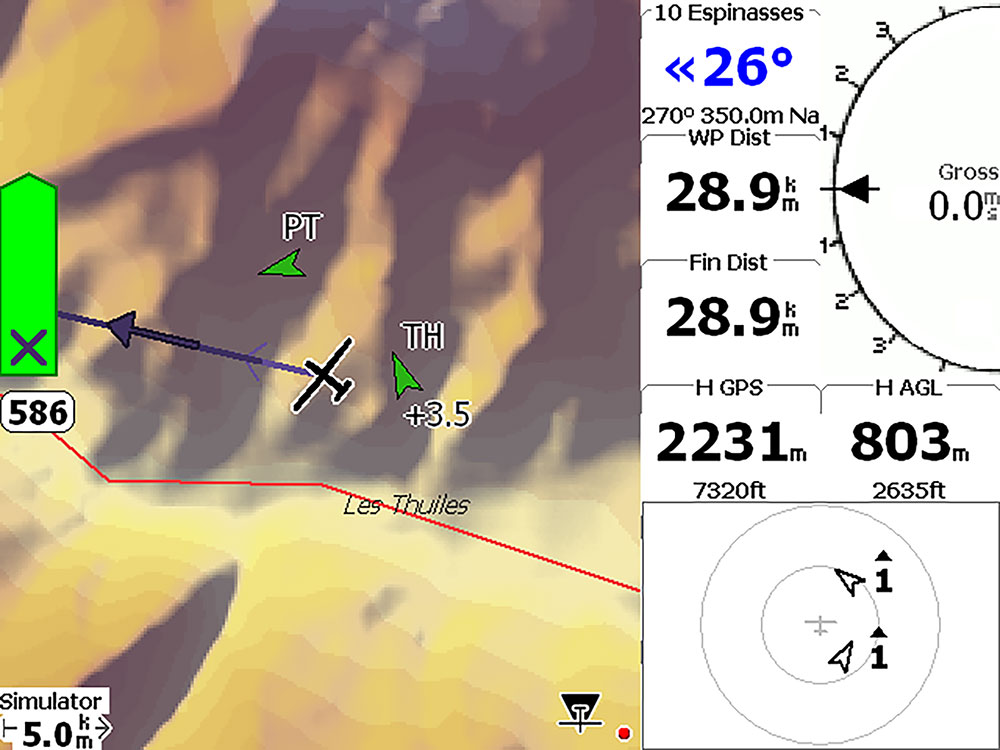
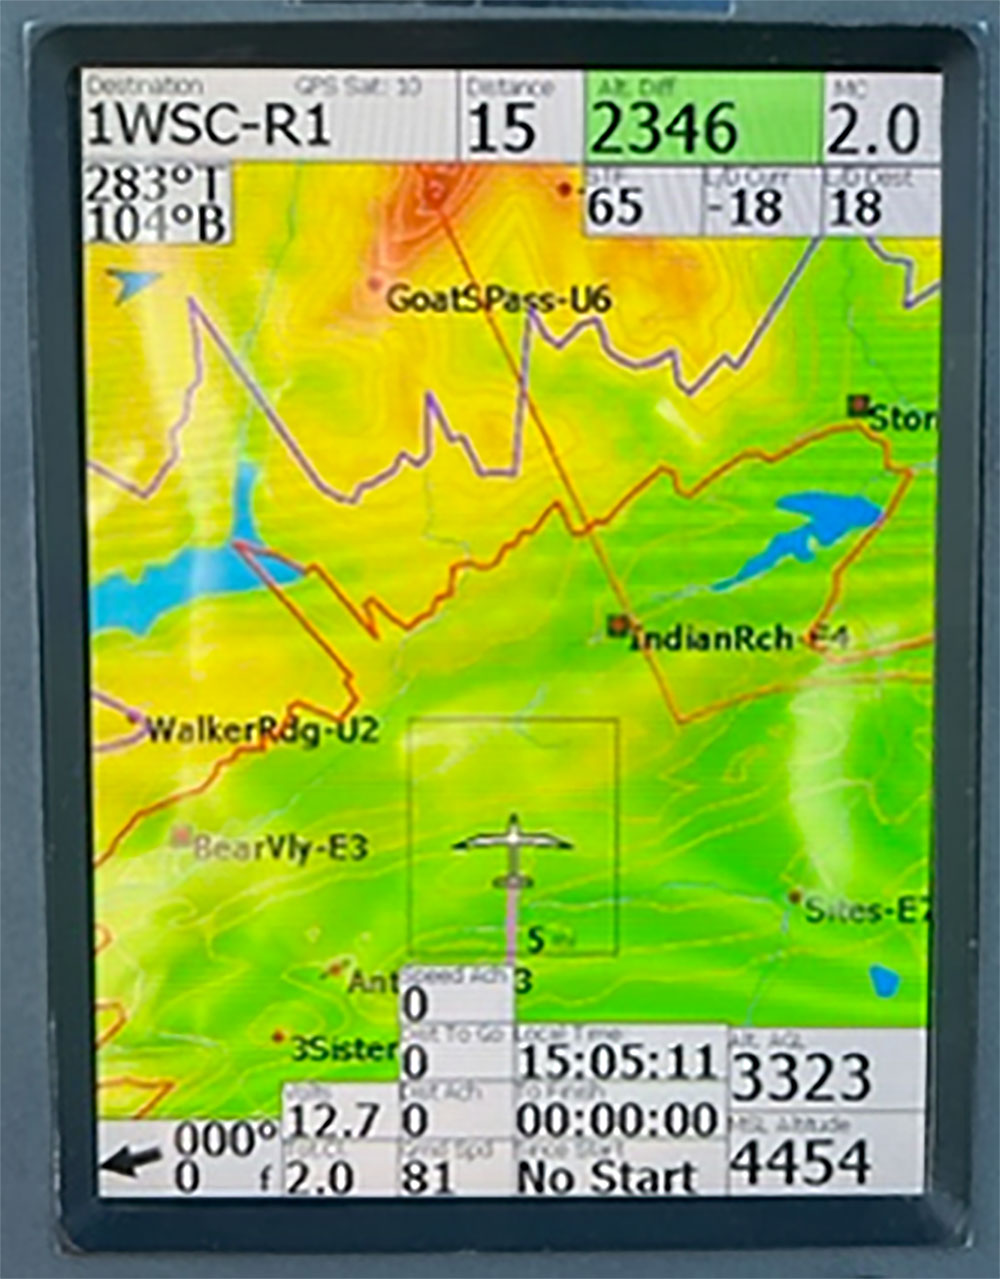
Advanced Customisation and Refinement
Once you are proficient with the basics, you can begin adding more information through navboxes.
- Group and Differentiate: Use grouping, colour and sizing to differentiate navboxes. Information related to a specific phase of flight, such as final glide, should be grouped together.
- Use Multiple Pages: A cluttered screen is a dangerous screen. Set up different pages for different phases of flight – such as cruising, thermalling, final glide – and switch between them as needed.
- Avoid Redundancy: Do not display the same piece of information in multiple places unless you have a specific, well-considered reason.
- Declutter: Be ruthless. If you find you aren't using the information from a particular navbox, remove it for a flight. If you don't miss it, leave it off.
The Path to Mastery: Self-Analysisand Simulation
The final step in learning to use flight computers as a cross country pilot is continuous self-analysis.
Ask yourself, "What mental calculations am I performing repeatedly? Is there a navbox for that? Will automating it help me fly better?" This iterative process will help you refine your screen layout and your flying.
A final, crucial note – the best place to learn how to operate your device and software is on the ground. All three major software systems can be connected to the Condor Soaring Simulator. You can gain an enormous amount of experience and build muscle memory in the comfort of your home, all year round, ensuring you are proficient with your system before you get in the air.
First published in Flightlines, the newsletter of the Gliding Club of Victoria.


